Getting Started with PACBTI for Armv8-M
Figuring all of this out was NOT fun, so I'm writing down how to set it up.
Added to the Arm8.1-M architecture, the Pointer Authentication and Branch Target Identification (PACBTI) Extension helps mitigate code reuse attacks by introducing a form of control flow integrity. The technical details will not be given here, but more information can be found inside of the architecture reference manual (Chapter B6. Pointer authentication and branch target identification Extension).
Getting Started
While not the most comprehensive IDE to explore this feature, as it does not provide as much integrated tools as µVision IDE, VS Code can be used to explore PACBTI. Note that the following guide was tested using Fedora 44 for x86_641
Setting up VS Code
Keil MDK v6 is offered as a VS Code extension. After opening the extension panel, simply create a new project with the following options:
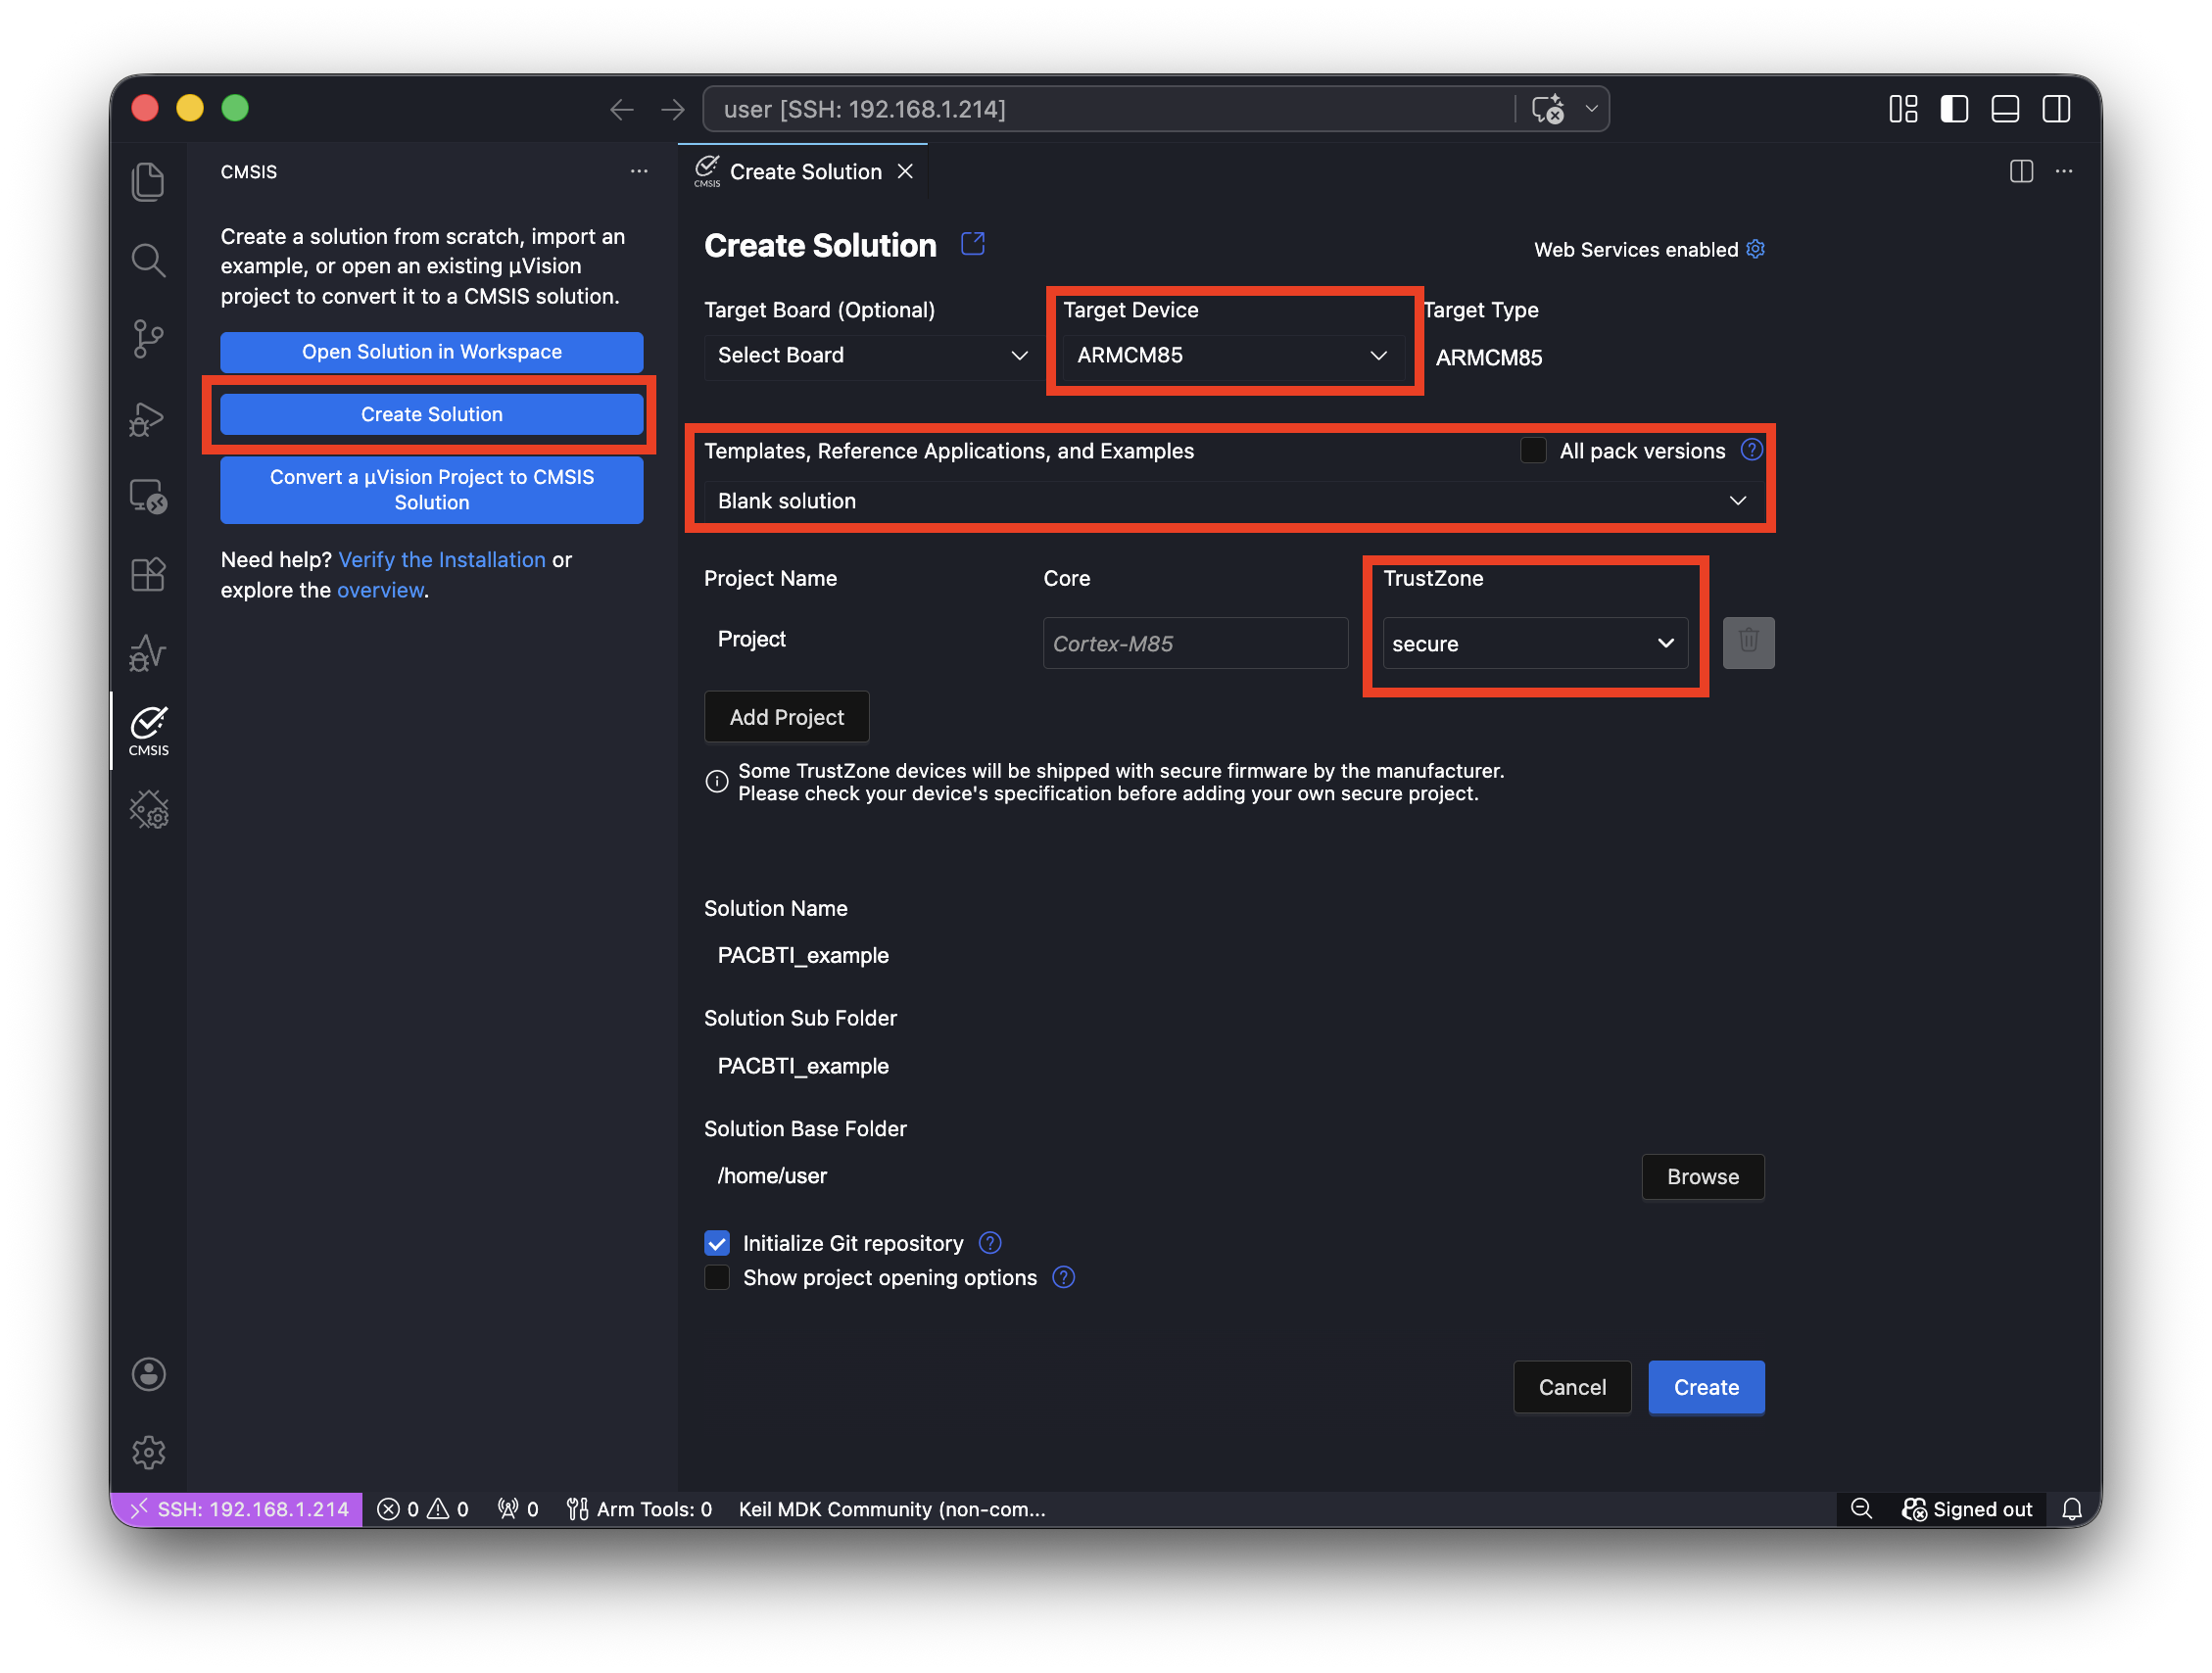
Upon entering the project a warning might appear on the bottom ribbon requesting a license. A community edition license will suffice.
Build Environment
There is some configurations that need to be changed in order to build. All of the following options can be accessed via the command palette (Ctrl + Shift + P)
Arm Tools: Configure Arm Tools Environment
Simply set all the options to match the listed. These are just the latest ones available at the time of writing this.
| Tool | Version |
|---|---|
| Arm CMSIS-Toolbox | 2.14.1 |
| Arm Compiler for Embedded | 6.24.0 |
| Arm Compiler for Embedded FuSa | None |
| Arm Debugger | 6.10.1 |
| Arm MDK-Toolbox | 1.1.0 |
| Arm Virtual Hardware for Cortex®-M based on Fast Models | 11.31.28 |
| GCC compiler for ARM CPUs | None |
| IAR Build Tools for arm | None |
| Kitware’s cmake tool | 3.31.12 |
| LLVM Embedded Toolchain for Arm CPUs | None |
| Ninja Build | 1.13.2 |
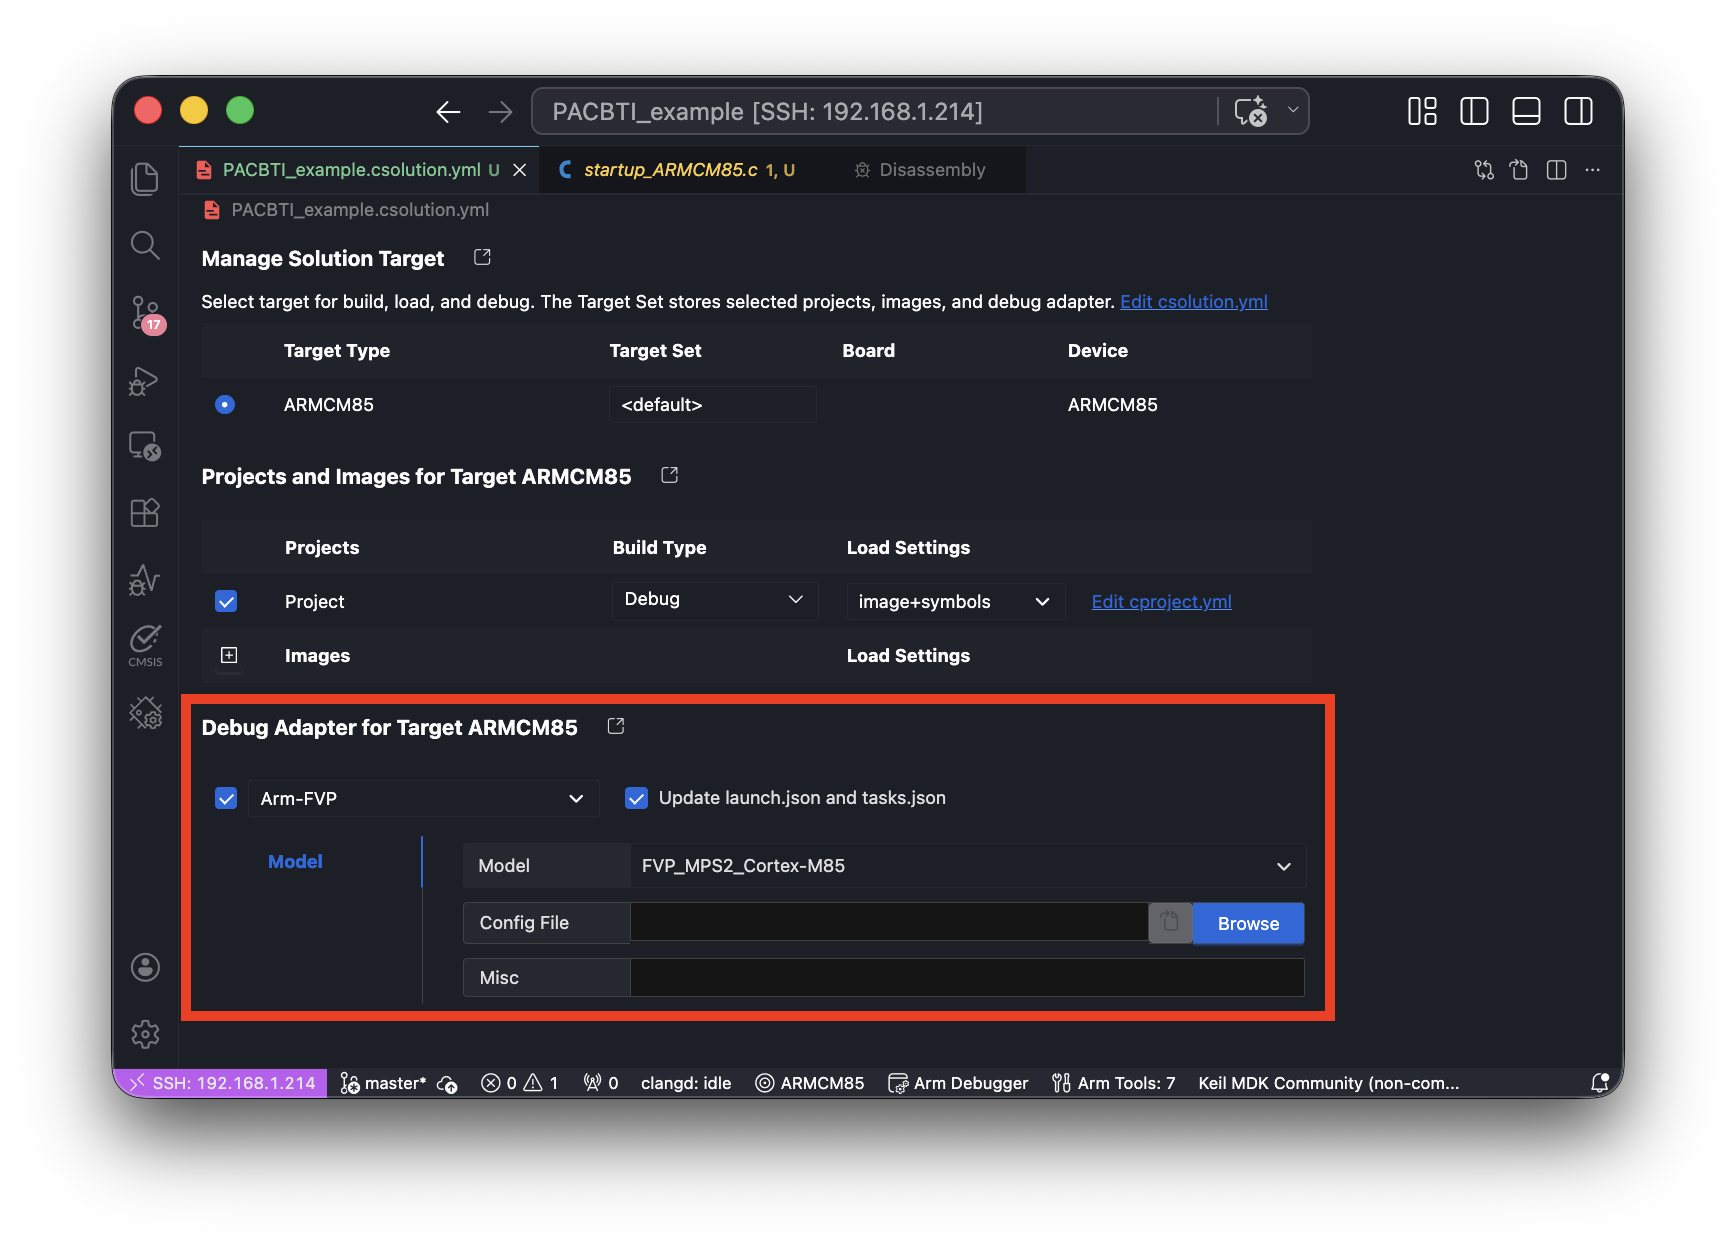
CMSIS: Manage Solution Settings
The only change here is that we need to use the Fixed Virtual Platforms provided by Arm. The selected Cortex-M85 has support for PACBTI and will be configured to support it later.
Minor Source Code Tweaks
There are some minor changes that need to be done in order to build the source code correctly:
- Because the project was set to Secure, there are some symbols that will be missing (The linker complains about a symbol
Image$$STACKSEAL$$ZI$$Base). To fix this add-mcmsetoProject/RTE/Device/ARMCM85/ARMCM85_ac6.sct. This file should look like this:
1
2
3
4
#! armclang -E --target=arm-arm-none-eabi -mcpu=cortex-m85 -xc -mcmse
; command above MUST be in first line (no comment above!)

...
- By default, the toolchain will not insert and
PACBTI/BTIinstructions, and needs to be given the compiler flag in order to do so. This is done by modifying<solution_name>.csolution.ymlas such:
1
2
3
4
5
6
7
8
# List of miscellaneous tool-specific controls
misc:
- for-compiler: AC6 # GDB requires DWARF 5, remove when using uVision Debugger
    C-CPP:
    - -gdwarf-5
    - -mbranch-protection=pac-ret+bti # <-- This line adds PAC and BTI
    ASM:
    - -gdwarf-5
Running and Debugging
At this point, the source code can be built, but cannot be debugged from the IDE. The Arm Debugger extension needs to be installed. This extension includes a guide on how to setup a launch.json configuration to debug using an FVP. The configuration used here looks like this:
1
2
3
4
5
6
7
8
9
10
11
12
13
14
15
16
17
18
{
    "name": "Debug (Main)",
    "type": "arm-debugger.configdb",
    "request": "launch",
    "cdbEntry": "Arm FVP::MPS2_Cortex_M85::Bare Metal Debug::Bare Metal Debug::Cortex-M85_0",
    "cdbEntryParams": {
        "model_params_file": [
            "${workspaceFolder}/FVP_MPS2_Cortex-M85/fvp_config.txt"
        ]
    },
    "programs": [
        "${command:arm-debugger.getApplicationFile}"
    ],
    "runControl": {
        "debugFromSymbol": "main"
    },
    "connectExistingDebugger": false
}
fvp_config.txt
Under the launch.json configuration page there is an option named Model Parameters File. After generating the file, copy the following configurations into the file:
1
2
3
4
5
6
# Parameters:
# instance.parameter=value       #(type, mode) default = 'def value' : description : [min..max]
#------------------------------------------------------------------------------
cpu0.CFGPACBTI=1                                      # (bool  , init-time) default = '0'      : Enables support for the Pointer Authentication and Branch Target Identification (PACBTI) Extension. FALSE: Disabled, TRUE:PAC implemented using the QARMA3 algorithm with BTI
cpu0.INITSVTOR=0x00000000                              # (int   , init-time) default = '0x10000000' : Secure vector-table offset at reset : [0x0:0xffffff80]
#------------------------------------------------------------------------------
Now the source code can be debugged through the IDE’s built-in debugger. An example is shown here:
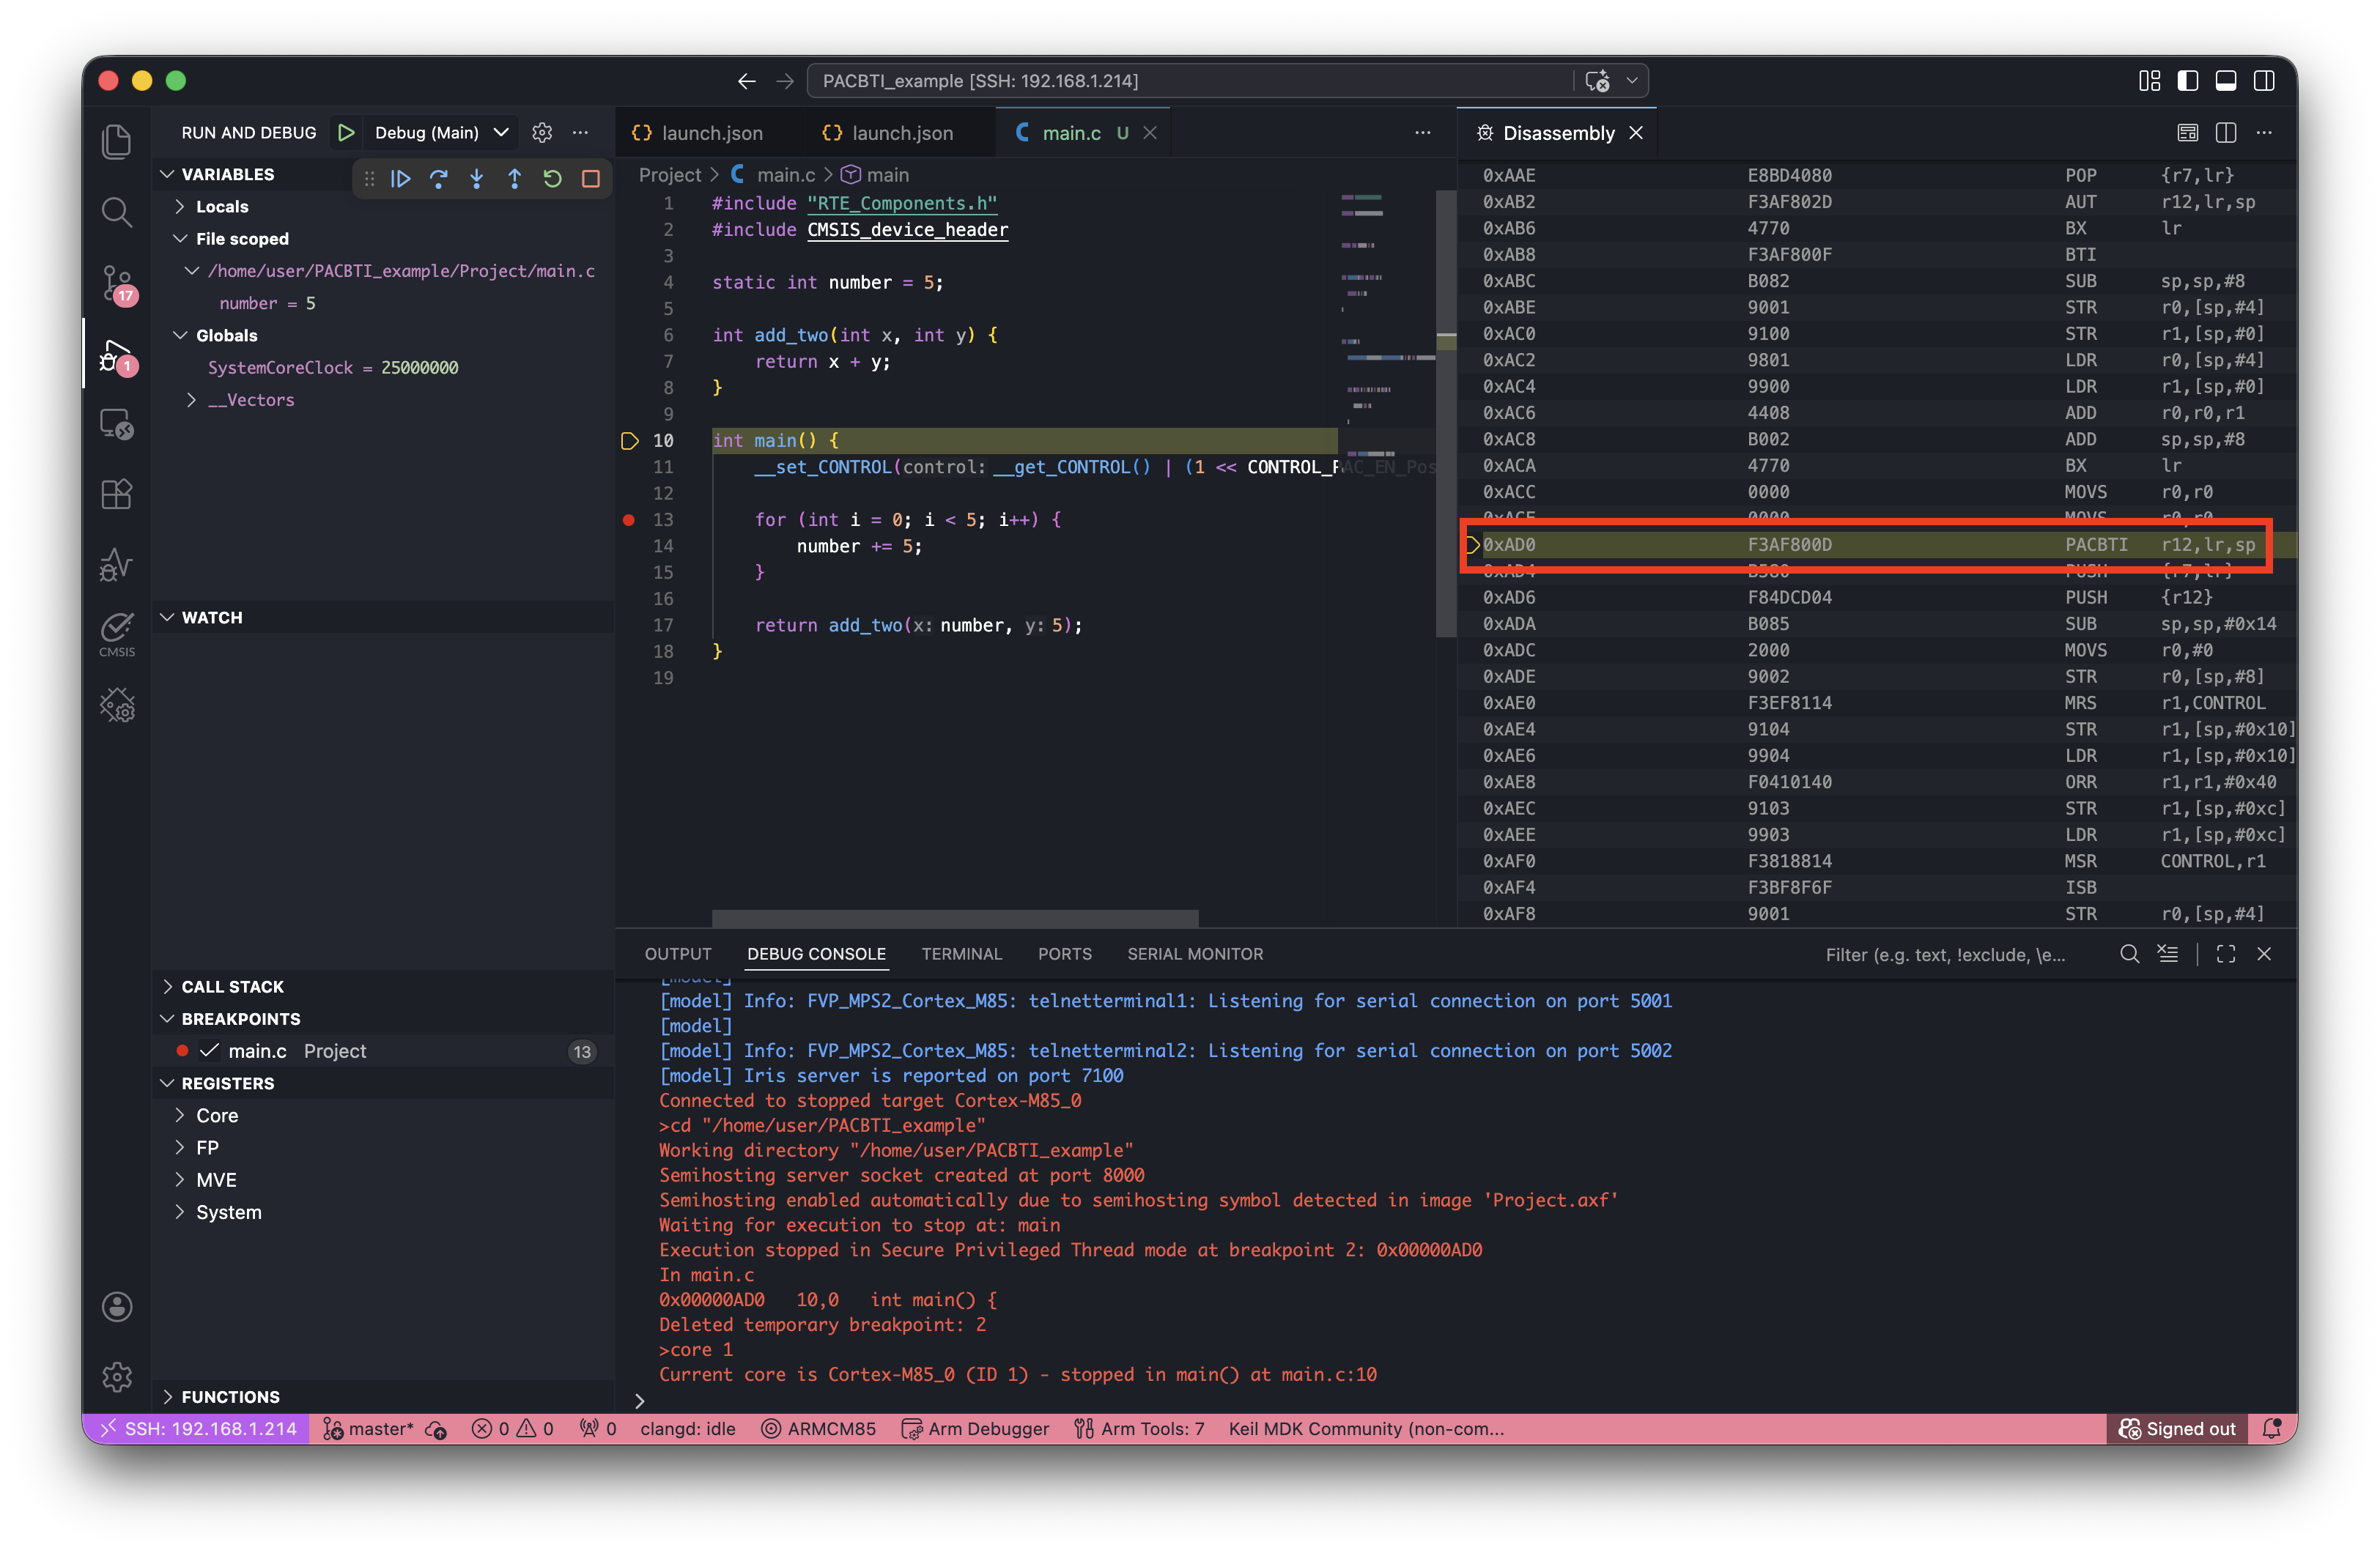
Note the inclusion of the
PACBTIinstruction. In this image, the core will enter aHardFaultbefore returning frommain
-
This guide should apply to any flavor of Linux and version of Windows, but is not guaranteed. MacOS does not work as it does not support the Fixed Virtual Platforms required. ↩︎